4 - Creating Items on CollecOnline
Tempo di lettura 4 min
Introduction
In today's digital world, managing collections has evolved, necessitating a platform like CollecOnline for efficient organization. Whether you want to add a single item, a set of items, NFTs, or fully utilize the platform's advanced features, each step is crucial to present your collection in the best light. In this article, we will detail each step, from the basics of adding items to more advanced tips to ensure that your collection is not only complete, but also impeccably organized.
Table of Contents
Adding an Individual Item
Adding a Set of Items
Adding NFTs
Additional Features on Item Records
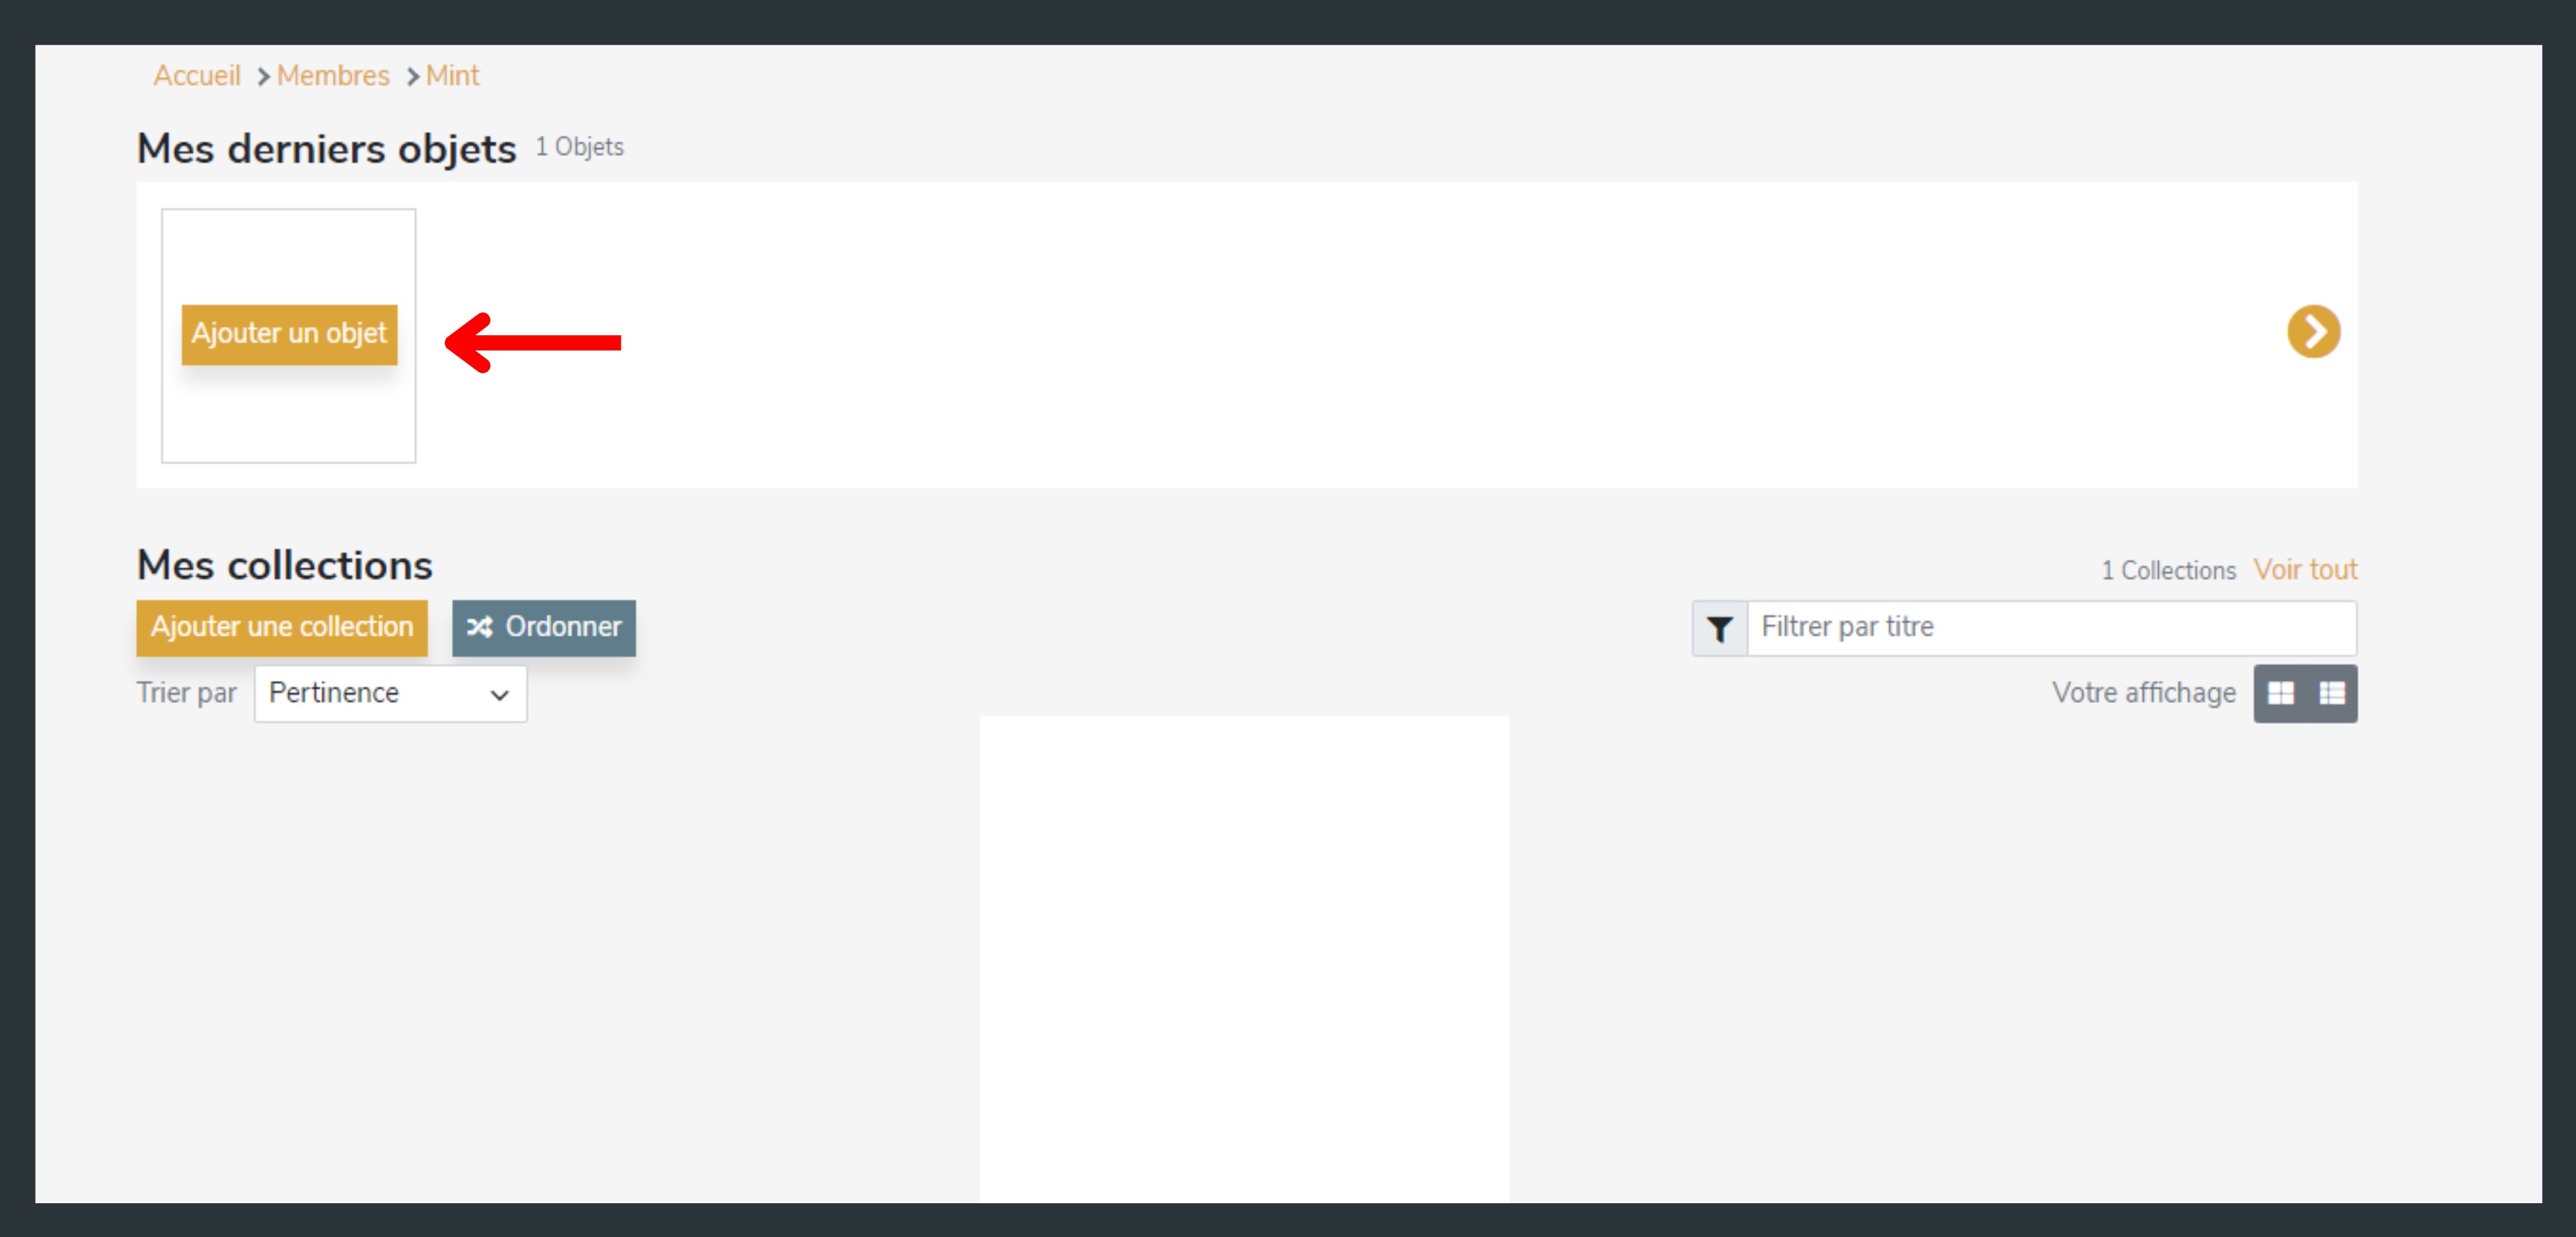
1. Adding an Individual Item
- From your "My Collections" space, click on "Add an item".
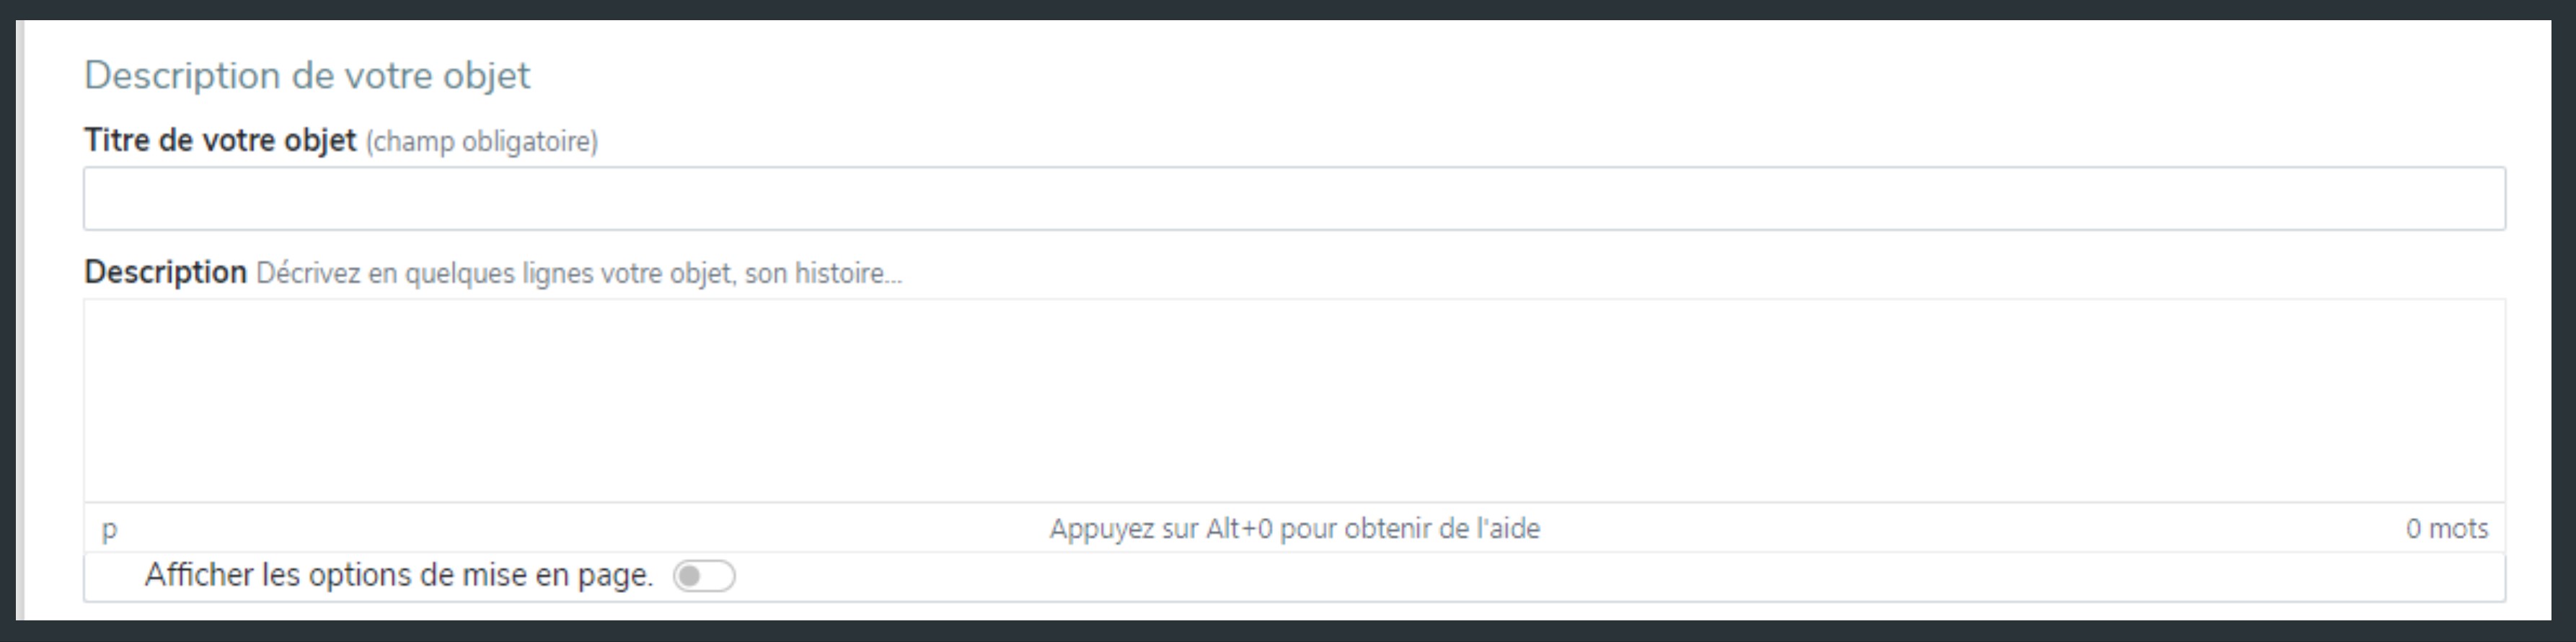
- Description Tab:
- Enter a title for your item.
- Use the text editor to describe your item: add text, change fonts, add color, etc.
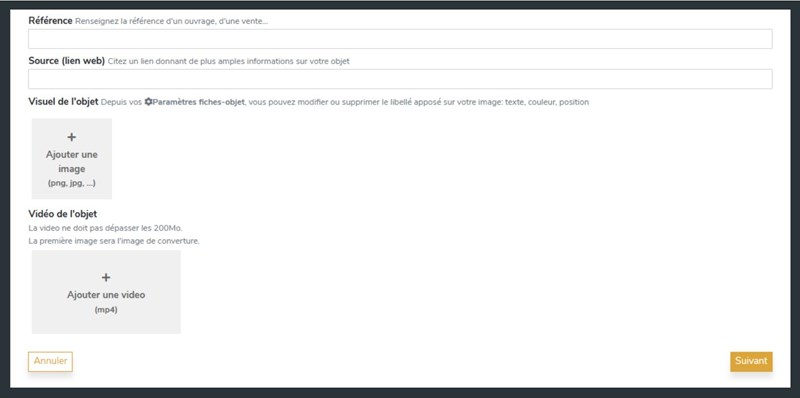
- Provide a reference and an external link (source, web link…).
- Add one or more images. (See tutorial on image management) If you are a Premium user, you can also add a video.
- Click "Next" to access the "Classification" tab.
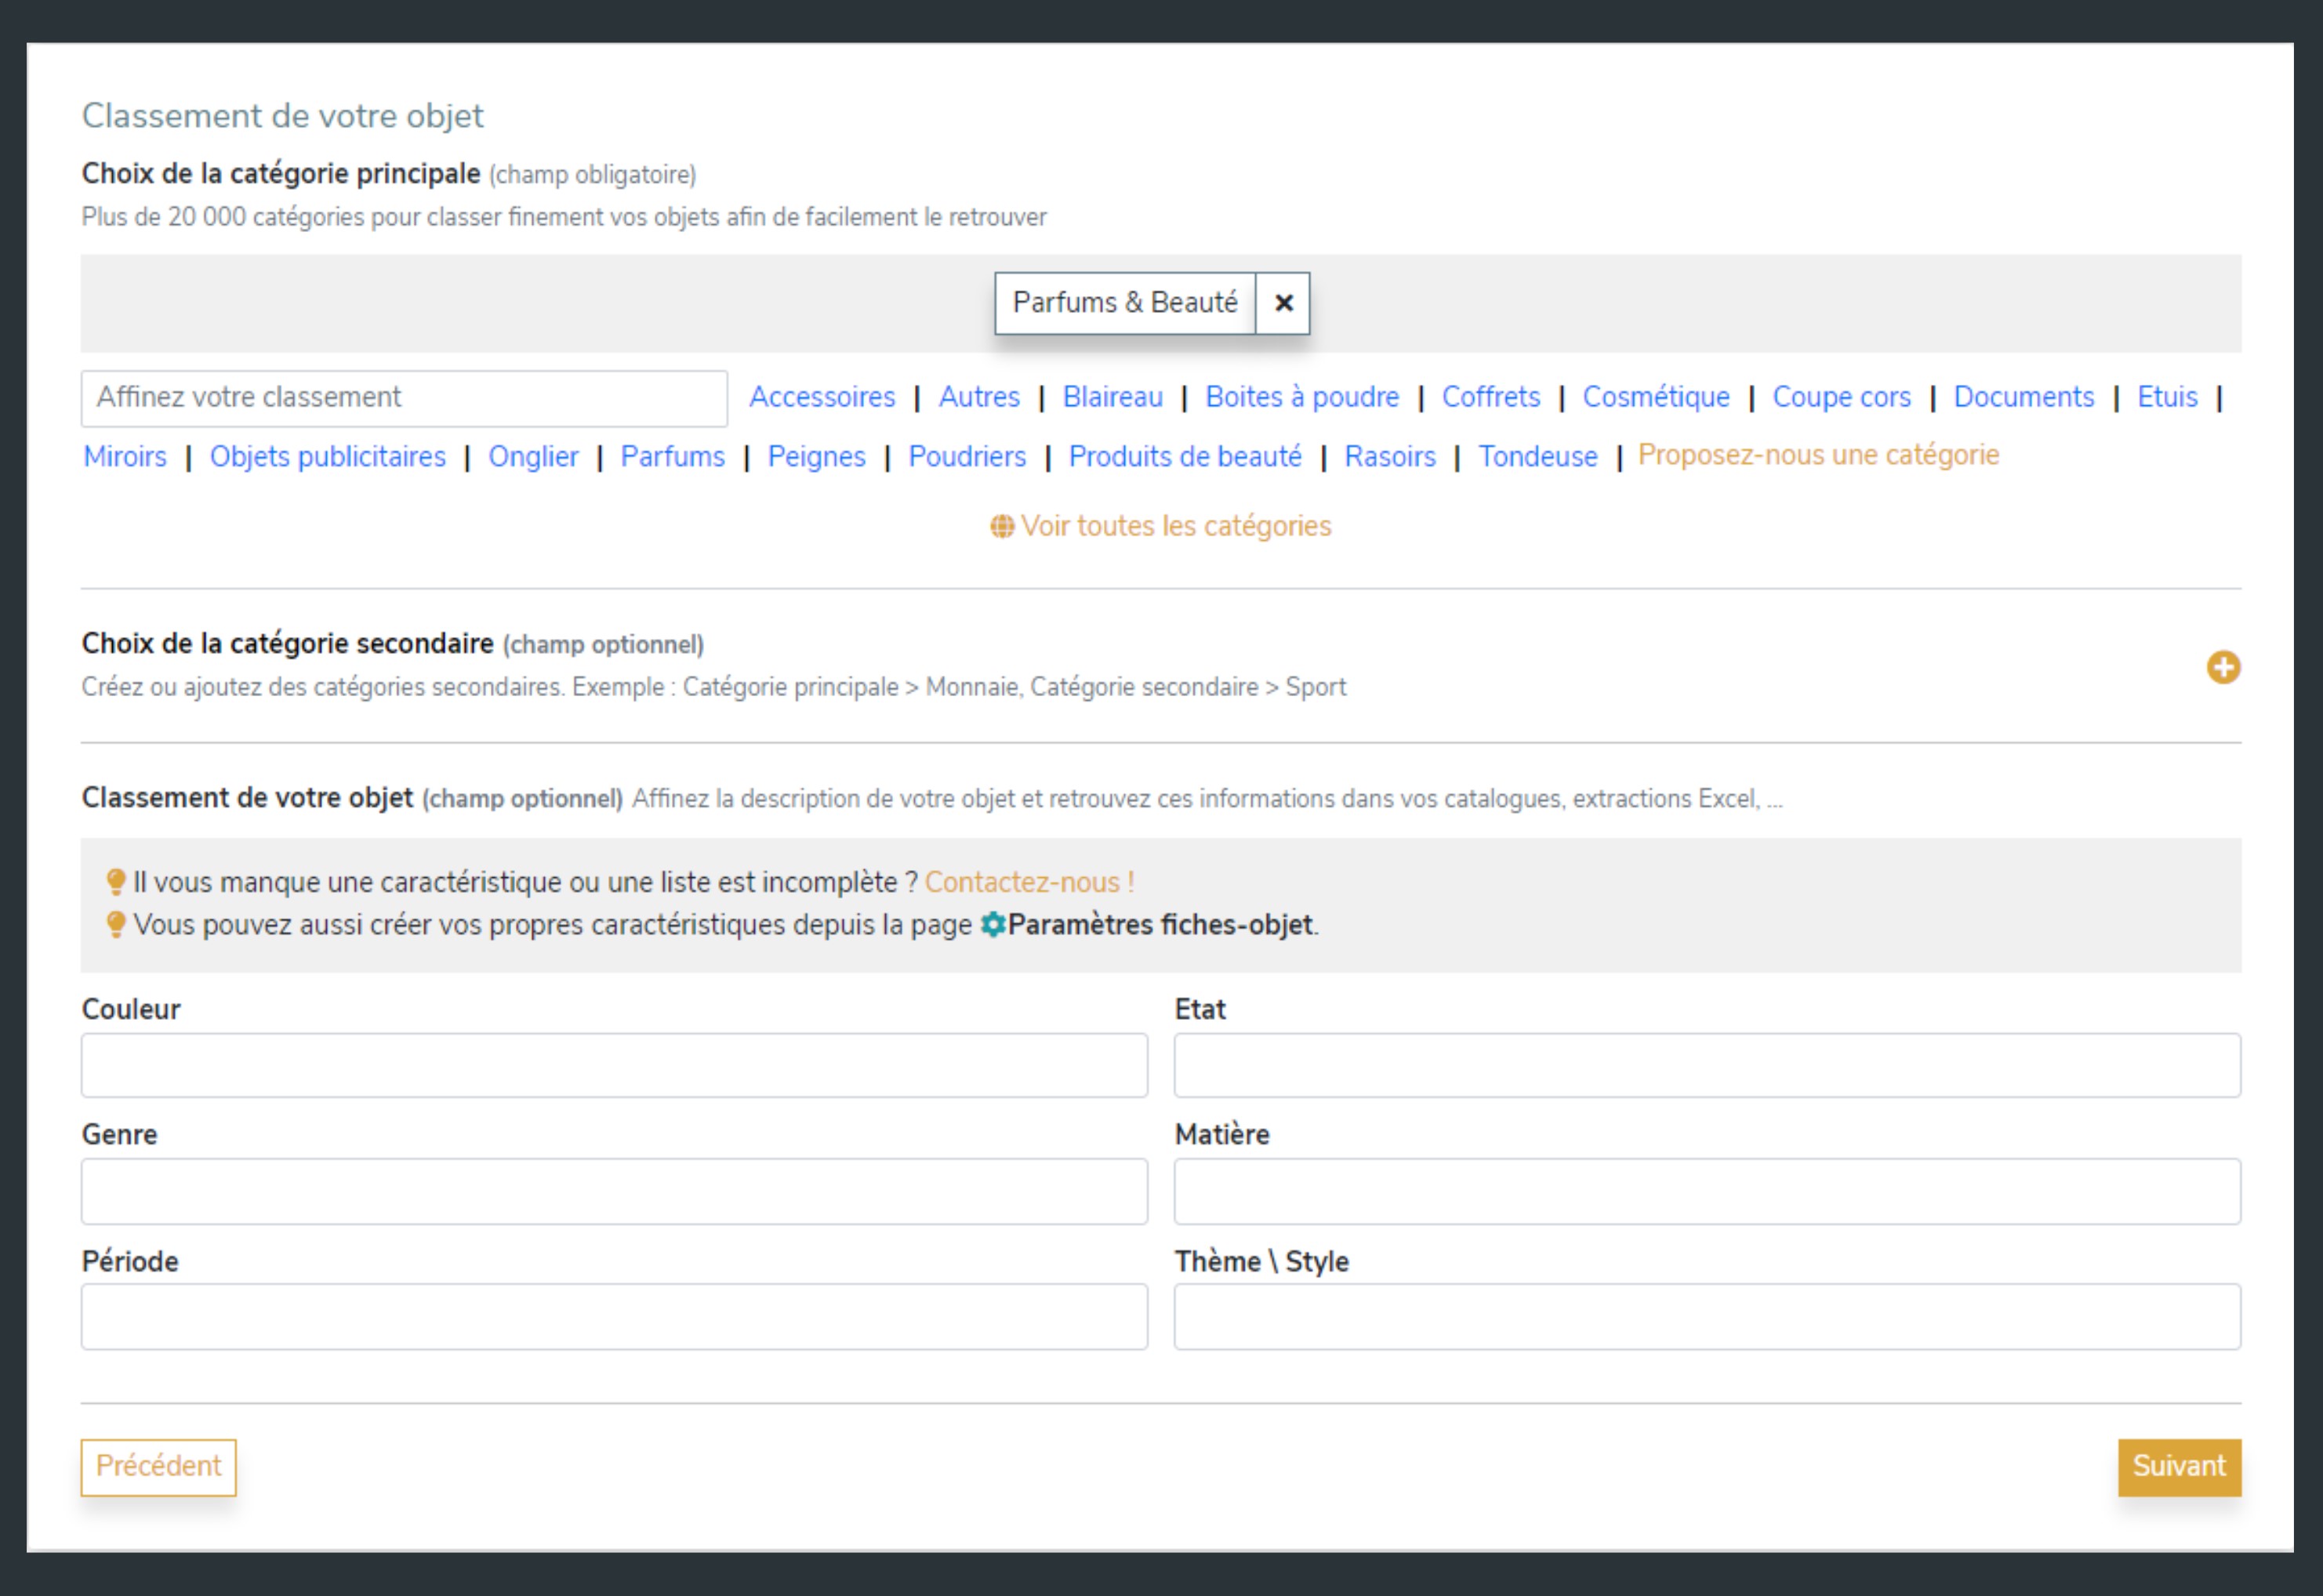
- Classification Tab:
- Choose the main category of your item.
- Add a secondary category if necessary.
- Provide your item's characteristics. Create additional fields via "Item Record Settings" if needed.
- Click "Next" to access the "Confidential Information" tab.
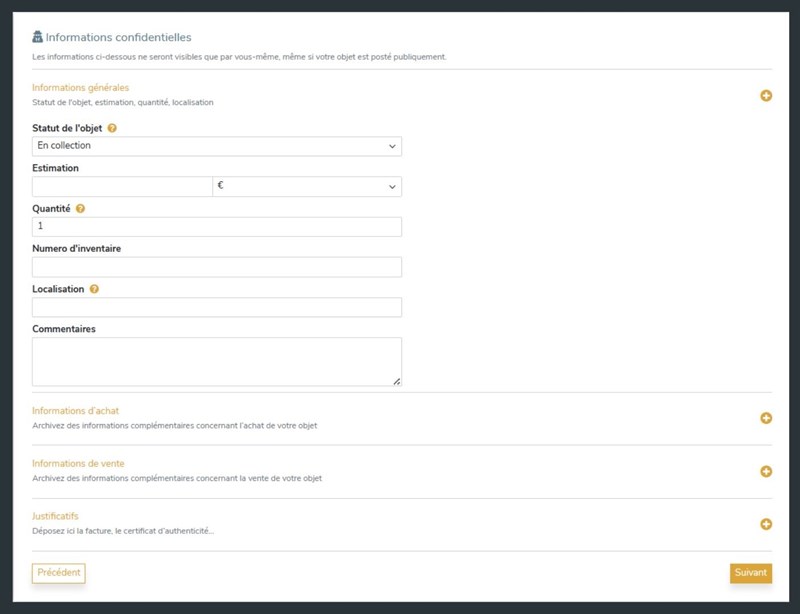
- Confidential Information Tab:
- Enter private details of your item: status, estimate, inventory number, location, etc.
- Indicate purchase or sale information.
- Import additional documents like invoices or certificates of authenticity.
- Click "Next" to access the "Collection" tab.
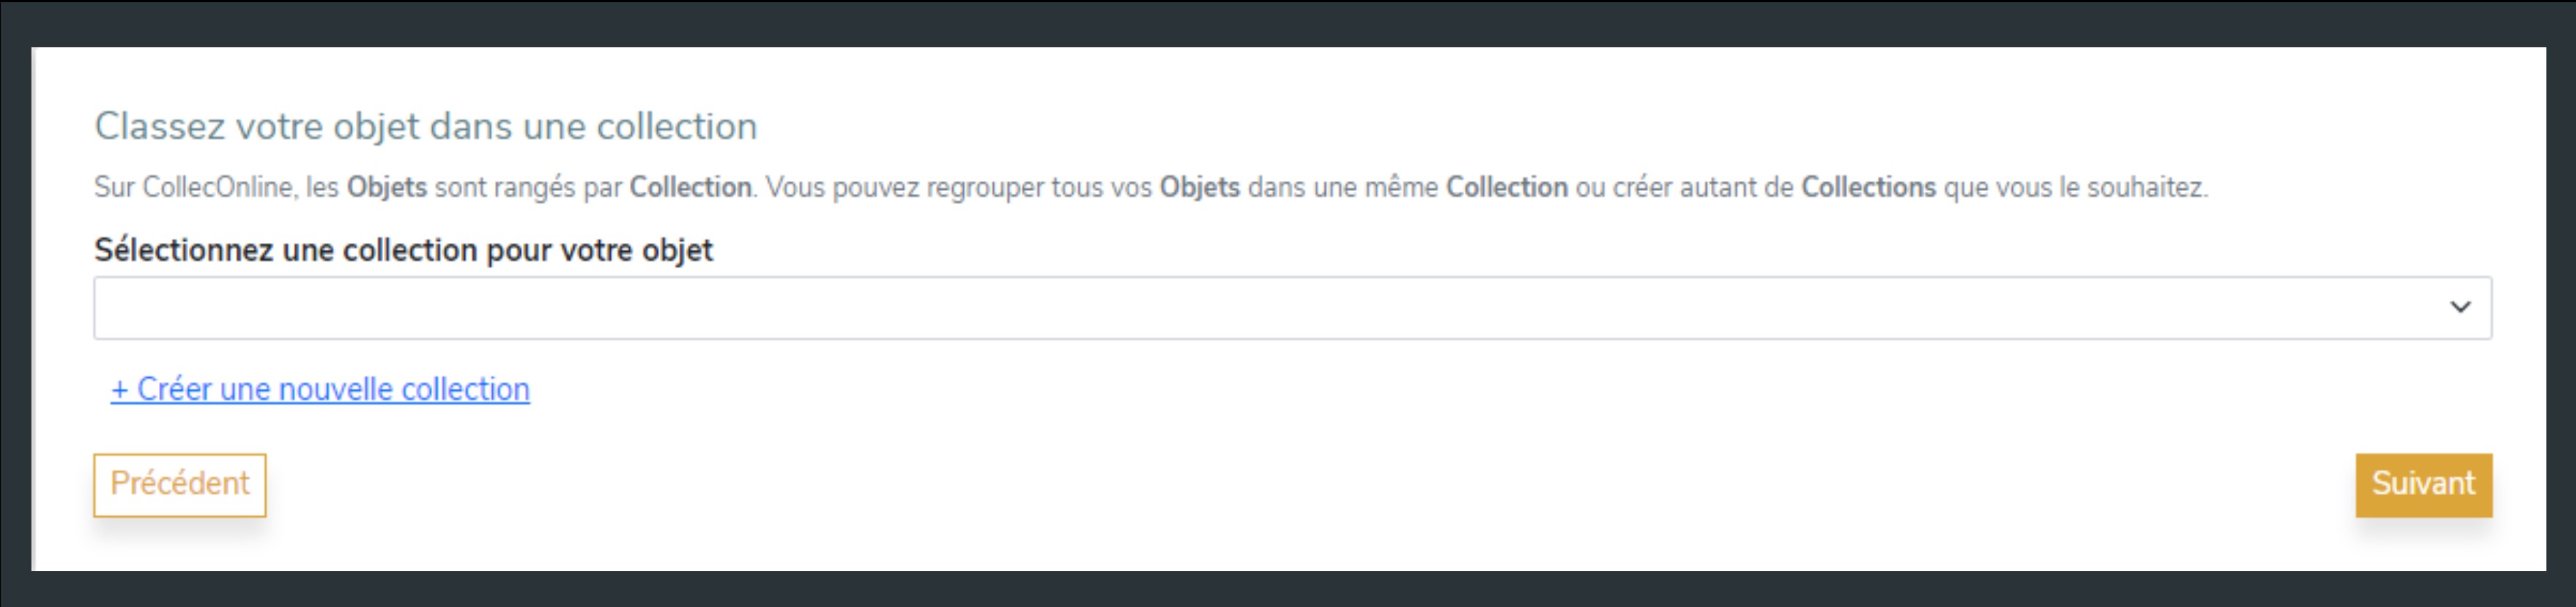
- Collection Tab:
- Verify or modify the collection associated with your item.
- Create a new collection if necessary.
- Click "Next" to access the "Settings" tab.
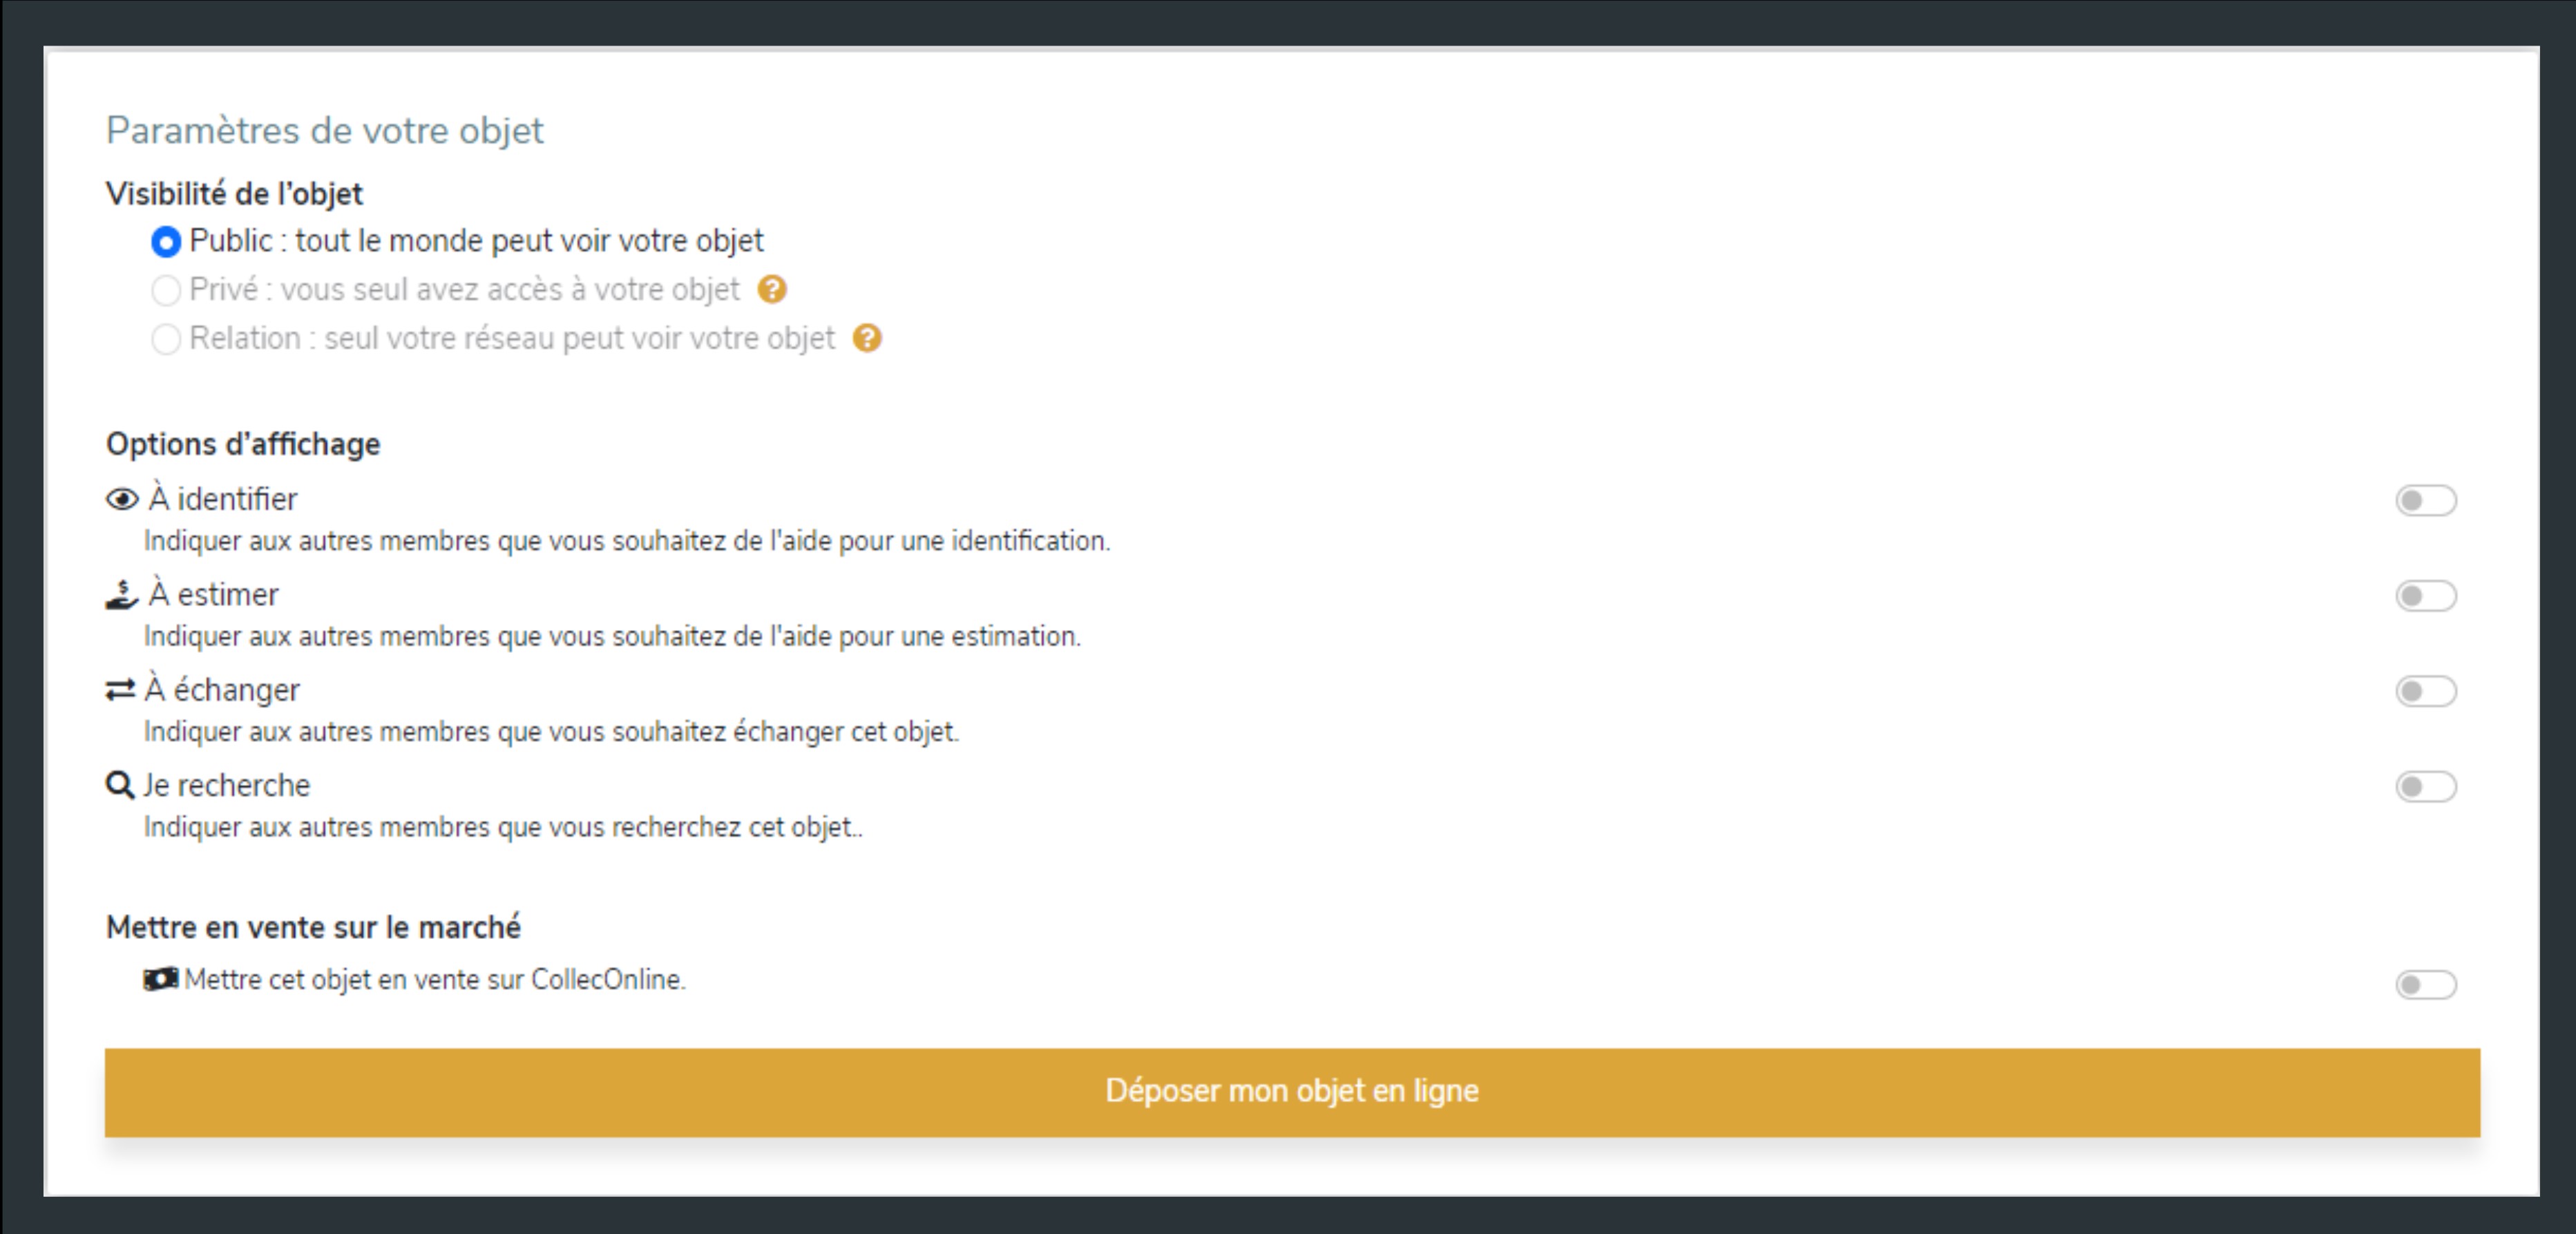
- Settings Tab:
- Item Visibility: (from the classic subscription) enter the visibility level of your item (Public, Private, Relation).
- Display Options: Check the display options according to your needs.
- Click either on "Deposit my item online" if you are satisfied, or on "Save".
2. Adding a Set of Items
- From your "My Collections" space: Click on "Add an item" then choose "Set of Items".
- Select up to 20 images. By default, the image file name is used as the title.
- Note that you will need to complete the details of each item later if you add multiple images, descriptions, or purchase information.

3. Adding NFTs

- From your "My Collections" space: Click on "Add an item" then choose "NFTs".
- Follow the next steps to integrate your NFTs:
- Add or select a wallet.
- Select a provider (like OpenSea, Rarible...).
- Click on “Show my NFTs.”
- Click on “Add my NFTs to my Collection.”

4. Additional Features on Item Records
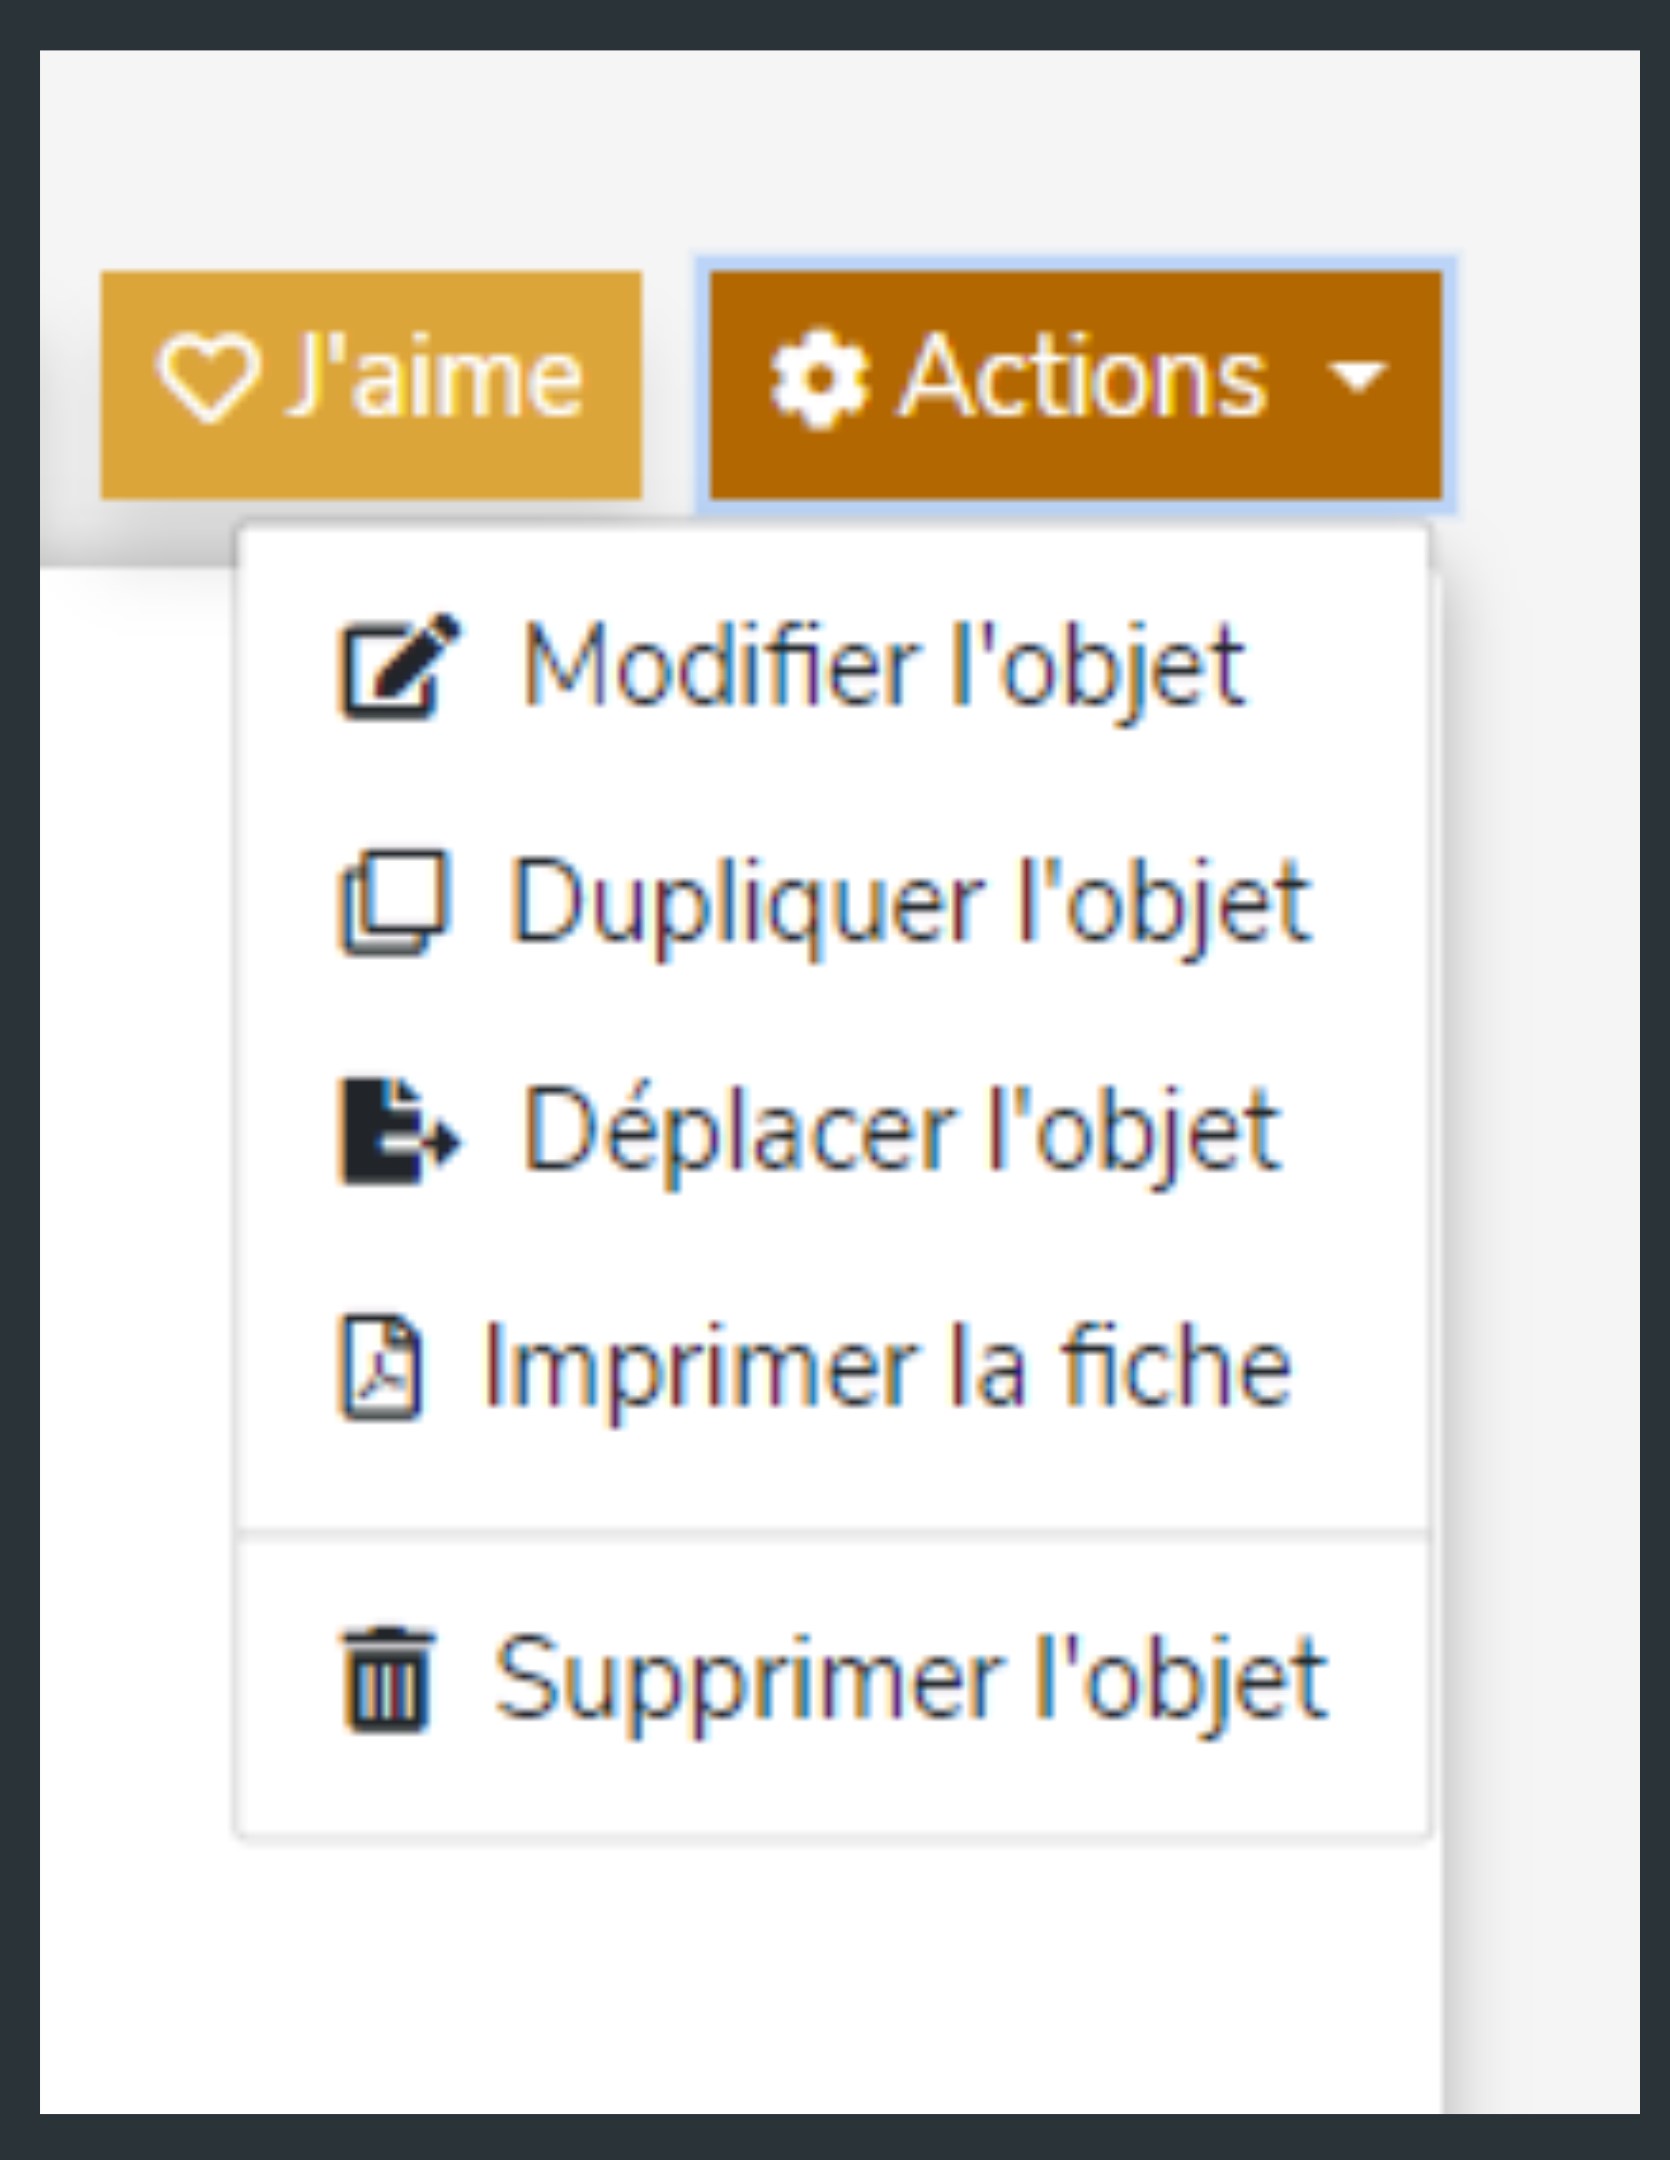
When you are on a specific item record, the "Actions" button located at the top right offers a series of features allowing you to manage your item more effectively. Here is a complete detail of the available options:
- Edit the item:
- This option allows you to directly access the item record in edit mode. You can then make all the necessary modifications, whether it be the description, category, or any other information related to the item.
- Duplicate the item:
- If you want to create a similar item or keep a specific layout for your records, this function is very useful. It allows you to make a complete copy of your item, including all information (title, description, classification). Note that you also have the option to duplicate or not the images associated with the item.
- Move the item:
- This function allows you to change the collection associated with your item. If, for example, you have multiple collections and want to reorganize your items, this option makes it easy to move an item from one collection to another.
- Print the record:
- If you want a physical copy of your item record or save it in PDF format, use this option. It offers an optimized layout for printing, ensuring that all relevant information about the item is clearly visible.
- Delete the item:
- Proceed with caution when using this option. Once you delete an item, it is permanently removed from the platform and cannot be recovered. Make sure you have backup copies of all important information before proceeding to delete.
By using these features, you can efficiently manage your items on CollecOnline and ensure that each item is organized, presented, and saved according to your preferences.
The key to a successful digital collection lies in how it is managed, organized, and presented. With CollecOnline, every collector, whether novice or experienced, has a complete set of tools to ensure that each item is displayed optimally. By following these steps and using the advanced features, you can not only safely preserve your valuable items but also present them in an attractive and professional manner. So, explore, experiment, and shape your collection like never before.